ARTICLES
Control LED light color via an Arduino and an iPhone over BLE
This tutorial will show you how to control an RGB LED via an Arduino and an iOS device. It will utilize the LightShow app which lets you set a single color or create a light show with a sequence of colors.
If you want to control a Light Strip check out this tutorial instead.
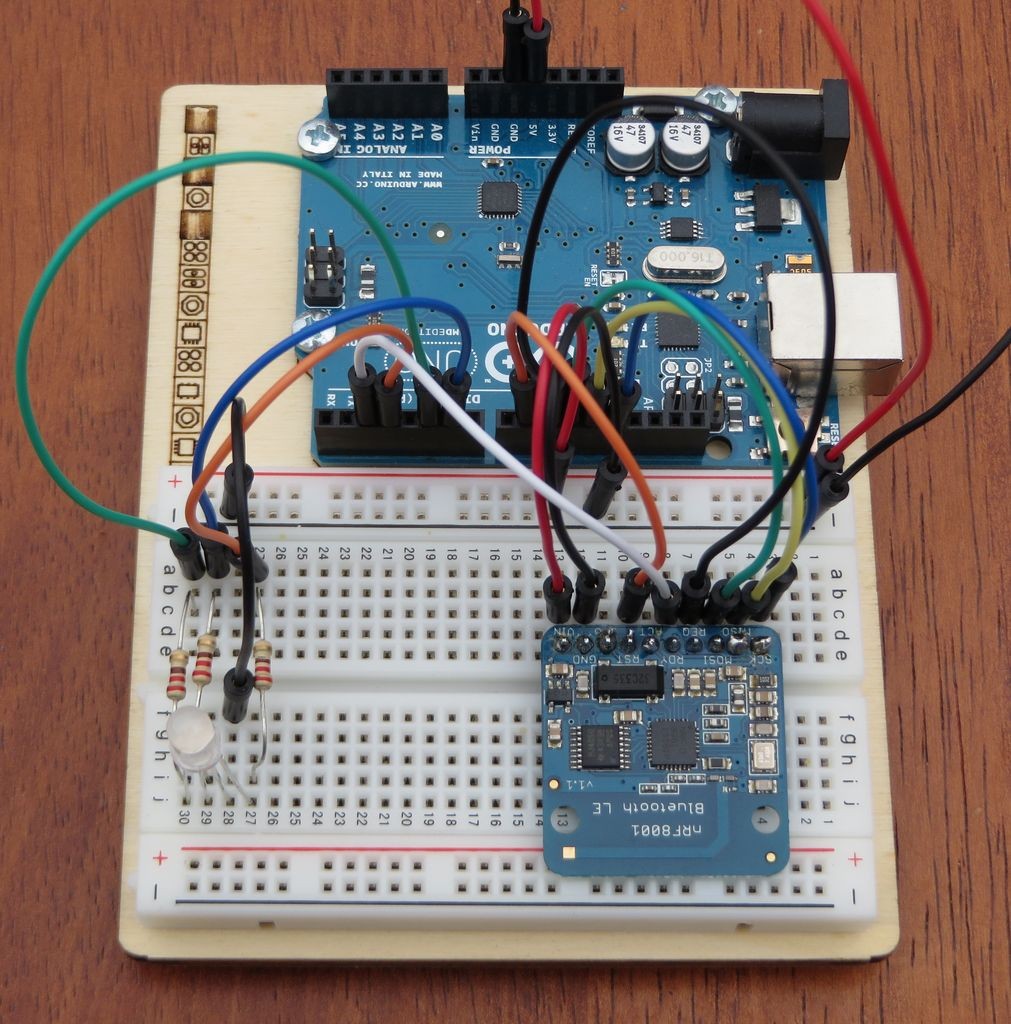
Materials:
iOS device
Step 1: Attach the RGB LED
<div class="photoset-item photoset-image">
<figure id="attachment_120" style="width: 72px" class="wp-caption aligncenter"><img src="/wp-content/uploads/2016/02/LED-72x300.jpg" alt="LED" width="72" height="300" srcset="/wp-content/uploads/2016/02/LED-72x300.jpg 72w, /wp-content/uploads/2016/02/LED.jpg 94w" sizes="(max-width: 72px) 100vw, 72px" /><figcaption class="wp-caption-text">The longest pin marked with a – is the cathode</figcaption></figure>
</div>
<div class="photoset-item photoset-image">
<figure id="attachment_121" style="width: 300px" class="wp-caption aligncenter"><img src="/wp-content/uploads/2016/02/Resistors.jpg" alt="Resistors" width="300" height="300" srcset="/wp-content/uploads/2016/02/Resistors.jpg 300w, /wp-content/uploads/2016/02/Resistors.jpg 150w, /wp-content/uploads/2016/02/Resistors.jpg 270w, /wp-content/uploads/2016/02/Resistors.jpg 230w, /wp-content/uploads/2016/02/Resistors.jpg 390w" sizes="(max-width: 300px) 100vw, 300px" /><figcaption class="wp-caption-text">220-ohm resistor</figcaption></figure>
</div>
</div>
</div>
<div class="photoset-row cols-2">
</div>
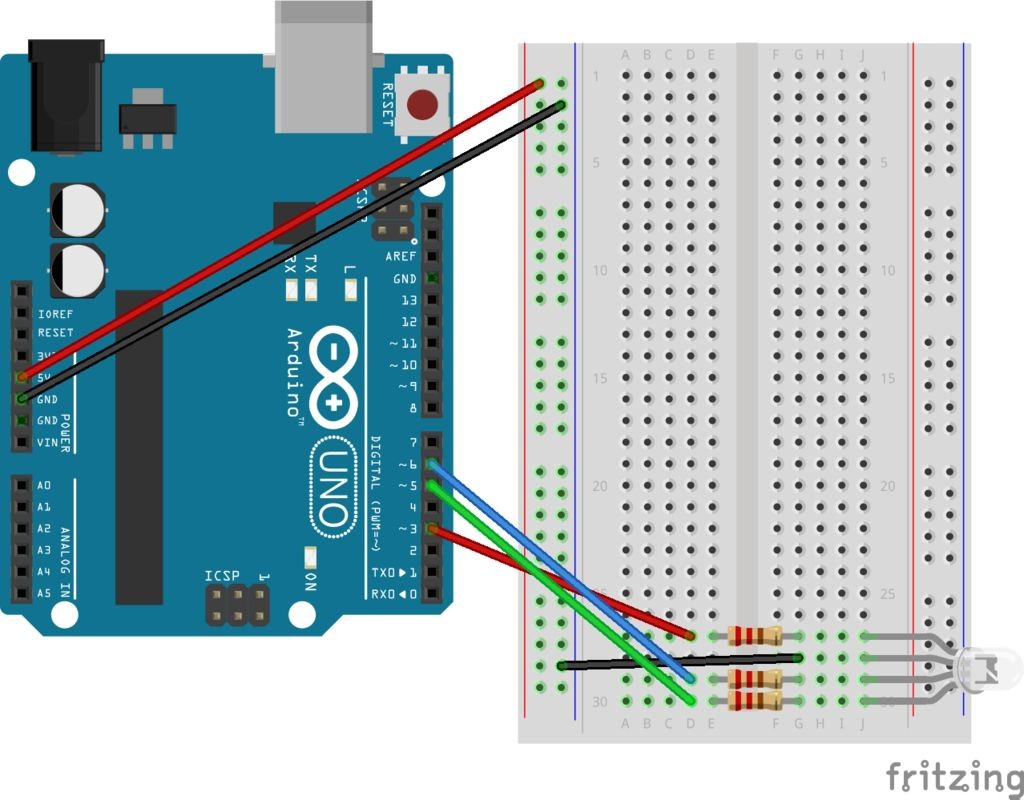
Use a common cathode RGB LED and three 220-ohm resistors.
<p style="text-align: left;">
The longest pin of the LED is the cathode and should be connected to the common ground.
</p>
<p style="text-align: left;">
Connect a 220-ohm resistor between each of the LED’s anodes and the Arduino.
</p>
<p style="text-align: left;">
Connect the Red, Green, and Blue pins to digital pins 3,5, and 6 respectively.
</p>
Step 2: Connect the Bluetooth Low Energy board
    <div class="photoset-item photoset-image">
      <img class="wp-image-66 size-medium aligncenter" src="/wp-content/uploads/2016/02/LightShow_BluetoothLE_nRF8001.jpg" alt="LightShow_BluetoothLE_nRF8001" />
    </div>
  </div>
</div>
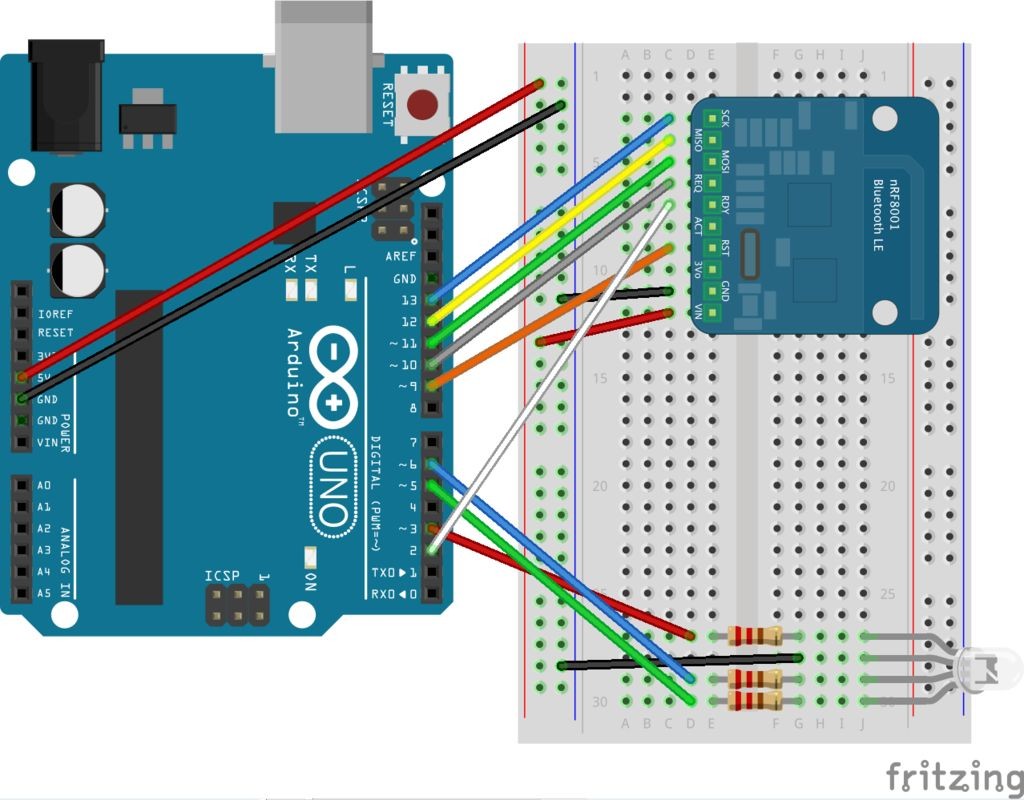
Connect the nRF8001 Bluetooth LE breakout board to your breadboard. Connect the BLE pins to the Arduino as follows:
<ul>
<li>
SCK – 13
</li>
<li>
MISO – 12
</li>
<li>
MOSI – 11
</li>
<li>
REQ – 10
</li>
<li>
RST – 9
</li>
<li>
RDY – 2
</li>
</ul>
<p>
Further information on the using the nRF8001 BLE board is available <a href="https://learn.adafruit.com/getting-started-with-the-nrf8001-bluefruit-le-breakout/introduction" rel="nofollow">here</a>.
</p>
Step 3: Upload the sketch to the Arduino
Clone or download the LightShow GitHub repository at https://github.com/kitefaster/LightShow.
<ol>
  <li>
    Copy and paste the Adafruit_BLE_UART folder located in the libraries directory into your Arduino/libraries/ folder.
  </li>
  <li>
    Launch the Arduino IDE and open the LightShow/LightShowArduino/LightShowArduino.ino sketch. Upload it to your Arduino board.
  </li>
</ol>
Step 4: Download and install the LightShow app
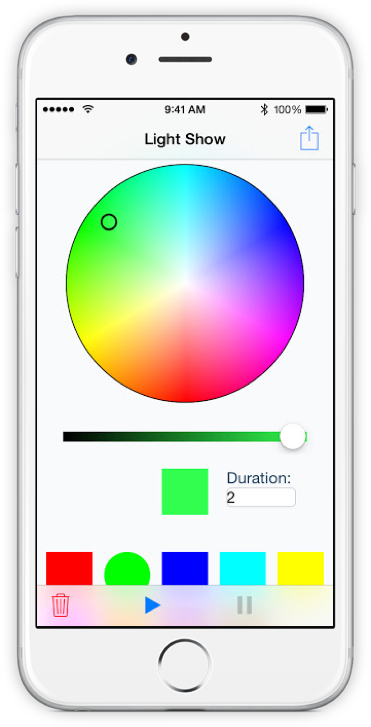
Note: The LightShow app is no longer available.